Zod
2023-08-14
ReactZodTypeScript
Table of Contents
1. 프로젝트 세팅 React + TS + Vite
$ npm init vite@latest React-Zod -- --template react-ts
$ cd React-Zod
$ npm i
$ npm i zod
2. 사용해보기
2-1. 회원가입 폼 만들어보기
- 기본적인 zod 사용 방법을 알아봅니다.
zod 스키마 만들기
- 스키마란, 데이터의 구조와 규칙을 정의하는 것을 말합니다.
src/userType.ts
import { z } from "zod";

// validate 함수로 스키마 설정
const User = z.object({
  address: z.string(),
  password: z.string(),
  email: z.string().email().optional(), // optional option으로 값이 있든지 없든지 상관없이, email 형식이 아니면 error
  birth: z.date().optional(),
});

// 타입 설정
type UserType = z.infer<typeof User>;

export { User, type UserType };
- z.object로 설정된 User 객체는 zod의 속성을 상속받아 zod의 메소드를 사용할 수 있습니다. 즉 zod 스키마 설정을 한 것입니다.
- infer 메서드로 타입으로 변환이 가능합니다.
입력값 만들기
- 유저에게 받을 Input Element를 만들어 보겠습니다.
src/App.tsx
import "./App.css";
import { useReducer } from "react";

function reducer() {
}

function App() {
  const [state, dispatch] = useReducer(reducer, {
    address: "",
    password: "",
    email: "",
    birth: undefined,
  });

  return (
    <>
      <h1>Zod APP</h1>
      <div>
        <label htmlFor='address'>Address</label>
        <input type='text' id='address' onChange={dispatchAddress} />
      </div>
      <div>
        <label htmlFor='password'>Password</label>
        <input type='text' id='password' onChange={dispatchPassword} />
      </div>
      <div>
        <label htmlFor='email'>Email</label>
        <input type='text' id='email' onChange={dispatchEmail} />
      </div>
      <div>
        <label htmlFor='birth'>Birth</label>
        <input type='date' id='birth' onChange={dispatchBirth} />
      </div>
    </>
  );
}

export default App;
- state는 useReducer로 관리하고, initial state와 reducer를 할당합니다.
리듀서 함수 만들기
src/App.tsx
function reducer(state, action) {
  console.log(action);
  switch (action.type) {
    case "ADDRESS":
      return { ...state, address: action.payload };
    case "PASSWORD":
      return { ...state, password: action.payload };
    case "EMAIL":
      return { ...state, email: action.payload };
    case "BIRTH":
      return { ...state, birth: new Date(action.payload) };
    default:
      return state;
  }
}
// app.tsx에 추가
- 리듀서 함수는 두가지 parameter를 받습니다, state와 action
- 초기의 state는 initial state로 할당한 값들이 들어가 있습니다.
- action 파라미터는 type과 payload라는 객체를 받습니다.
리듀서 함수 만들기-2
src/App.tsx
import { UserType } from "./userType";

function reducer(state: UserType, action): UserType {
  switch (action.type) {
    case "ADDRESS":
      return { ...state, address: action.payload };
    case "PASSWORD":
      return { ...state, password: action.payload };
    case "EMAIL":
      return { ...state, email: action.payload };
    case "BIRTH":
      return { ...state, birth: new Date(action.payload) };
    default:
      return state;
  }
}
- state와 return에 타입을 추가해 봅시다. import로 정의했던 type을 정의합니다.
action type 만들기
type ActionType = {
  type: "ADDRESS" | "PASSWORD" | "EMAIL" | "BIRTH";
  payload: string;
};

function reducer(state: UserType, action: ActionType): UserType {
  switch (action.type) {
    case "ADDRESS":
      return { ...state, address: action.payload };
    case "PASSWORD":
      return { ...state, password: action.payload };
    case "EMAIL":
      return { ...state, email: action.payload };
    case "BIRTH":
      return { ...state, birth: new Date(action.payload) };
    default:
      return state;
  }
}
- action 타입도 적용해봅니다.
dispatch 함수 추가
function App() {
  const [state, dispatch] = useReducer(reducer, {
    address: "",
    password: "",
    email: "",
    birth: undefined,
  });

  const dispatchAddress = (event: React.ChangeEvent<HTMLInputElement>) => {
    event.preventDefault();
    dispatch({ type: "ADDRESS", payload: event.target.value });
  };
  const dispatchPassword = (event: React.ChangeEvent<HTMLInputElement>) => {
    event.preventDefault();
    dispatch({ type: "PASSWORD", payload: event.target.value });
  };
  const dispatchEmail = (event: React.ChangeEvent<HTMLInputElement>) => {
    event.preventDefault();
    dispatch({ type: "EMAIL", payload: event.target.value });
  };
  const dispatchBirth = (event: React.ChangeEvent<HTMLInputElement>) => {
    event.preventDefault();
    dispatch({
      type: "BIRTH",
      payload: new Date(event.target.value).toISOString(),
    });
  };

  return (
    <>
      ...
    </>
  );
}

export default App;
- 값을 업데이트 할 dispatch 함수를 작성합니다.
dispatch input에 연결하기
function App() {
  const [state, dispatch] = useReducer(reducer, {
    address: "",
    password: "",
    email: "",
    birth: undefined,
  });

...dispatch 함수들

  return (
    <>
      <h1>Zod APP</h1>
      <div>
        <label htmlFor='address'>Address</label>
        <input type='text' id='address' onChange={dispatchAddress} />
      </div>
      <div>
        <label htmlFor='password'>Password</label>
        <input type='text' id='password' onChange={dispatchPassword} />
      </div>
      <div>
        <label htmlFor='email'>Email</label>
        <input type='text' id='email' onChange={dispatchEmail} />
      </div>
      <div>
        <label htmlFor='birth'>Birth</label>
        <input type='date' id='birth' onChange={dispatchBirth} />
      </div>
      <div>
    </>
  );
}
- onChange시 작동할 dispatch 함수를 연결합니다.
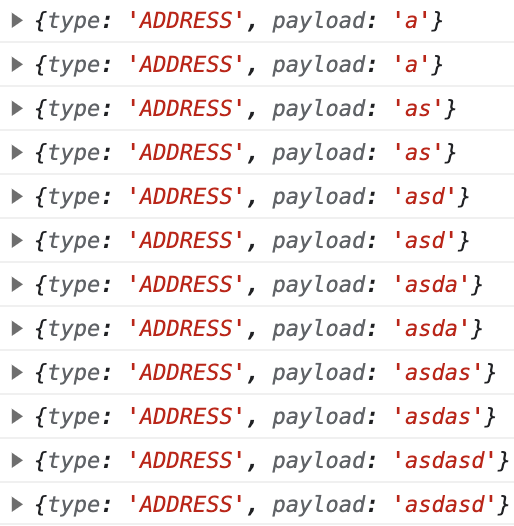
- 리듀서 함수에 console.log(action)을 호출하면 이런 모습일 겁니다.
전송버튼 누를 시 유효성 검사 실행
src/userType.ts
import { z } from "zod";

// validate 함수로 유효성 설정
const User = z.object({
  address: z.string(),
  password: z.string(),
  email: z.string().email().optional(), // optional option으로 값이 있든지 없든지 상관없이
  birth: z.date().optional(),
});

// 타입 설정
type UserType = z.infer<typeof User>;

function processUser(user: UserType) {
  return User.parse(user); // 유효성 검증
}

export { User, type UserType, processUser };
- processUser 함수 하나를 추가합니다. zod 속성을 상속받은 객체는 parse라는 메서드로 정의했던 User의 타입을 상속받은 객체에 대해 유효성 검사를 할 수 있습니다.
- parse는 error 메세지와 성공 시 성공한 객체를 리턴합니다.
- safeParse라는 메서드는 동일한 기능을 수행하지만 error를 리턴하지 않고 성공과 실패여부를 담은 success 객체를 리턴합니다.
전송버튼 만들고 유효성검사 연동하기
src/App.tsx
import { UserType, processUser } from "./zodTypes/userType";


function App() {
  const [state, dispatch] = useReducer(reducer, {
    address: "",
    password: "",
    email: "",
    birth: undefined,
  });

  dispatchs...

  const onClickHandler = (event: React.MouseEvent) => {
    event.preventDefault();
    try {
      // 유효성검사
      const result = processUser(state);
      console.log(result);
    } catch (error) {
      console.error(error);
    }
  };

  return (
    <>
      ...
      <div>
        <input type='button' value='눌러' onClick={onClickHandler} />
      </div>
    </>
  );
}

export default App;
- import로 processUser를 가져옵니다. onClick시 onClickHandler가 동작하고 그 안에 있는 processUser 함수가 관리하고 있는 지역변수 state를 검사합니다.
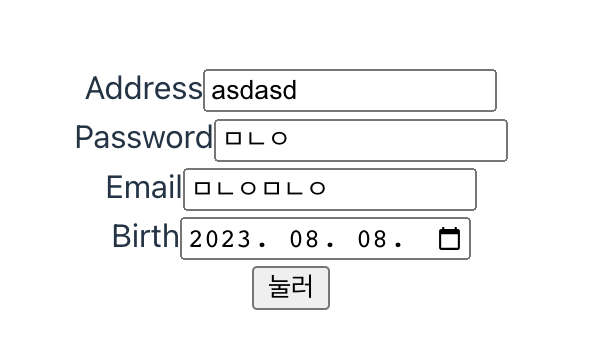
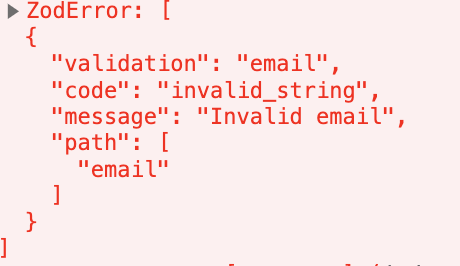
-
이메일 형식에 맞지 않는다는 에러가 발생합니다.
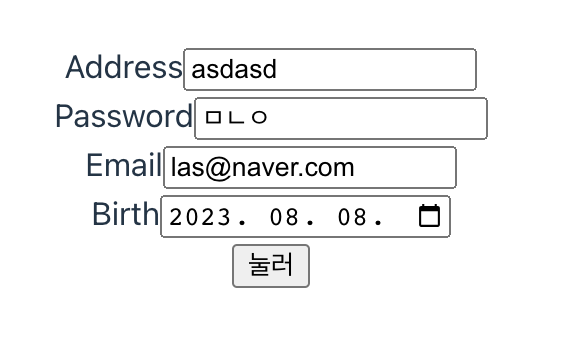

-
유효성 검사 통과 시 검사에 통과한 객체를 리턴합니다.
2-2. 요구사항 정의
예시로 간단한 폼을 만들었지만, 실제 회원가입에서는 요구하는 유효성 검사가 훨씬 까다롭겠죠. 그 요구사항대로 로직을 zod로 작성해보겠습니다.
- 요구사항 목록아이디 (Username):길이가 3자 이상 20자 이하여야 합니다.알파벳 소문자, 숫자, 밑줄(_)만 사용할 수 있습니다.
- 비밀번호 (Password):길이가 8자 이상이어야 합니다.최소한 하나 이상의 대문자, 소문자, 숫자, 특수문자를 포함해야 합니다.
- 이메일 (Email):올바른 이메일 형식을 가져야 합니다 (예: example@example.com).이름 (Name):공백을 제외하고 최소 2자 이상이어야 합니다.
- 알파벳 대소문자만 사용할 수 있습니다.생년월일 (Birth):date 형식 이어야 합니다.
zod 스키마 만들기
src/joinUserType.ts
import { z } from "zod";

// 입력값 유효성 처리
const JoinUser = z.object({
  id: z
    .string()
    .trim()
    .min(4)
    .max(20)
    .regex(/^[a-z0-9_]+$/),
  password: z
    .string()
    .trim()
    .min(8)
    .regex(/^(?=.*[a-z])(?=.*[A-Z])(?=.*\d)(?=.*[@$!%*?&])[A-Za-z\d@$!%*?&]+$/),
  email: z.string().trim().email(),
  name: z
    .string()
    .trim()
    .min(2)
    .regex(/^[A-Za-z]+$/),
  birth: z.date(),
});

// type으로 만들기
type JoinUserType = z.infer<typeof JoinUser>;

function processJoinUser(user: JoinUserType) {
  // 유효성 검사
  return JoinUser.safeParse(user);
}

export { type JoinUserType, processJoinUser };
- zod의 z 객체를 받은 JoinUser의 프로퍼티는 zod 가 가지고 있는 많은 유효성 검사 메서드들을 사용하는 것을 확인할 수 있습니다.
- 요구사항 목록의 요구사항과 같이 구현한 것입니다. regex로 정규식 유효성 검사를 가능하게 합니다.
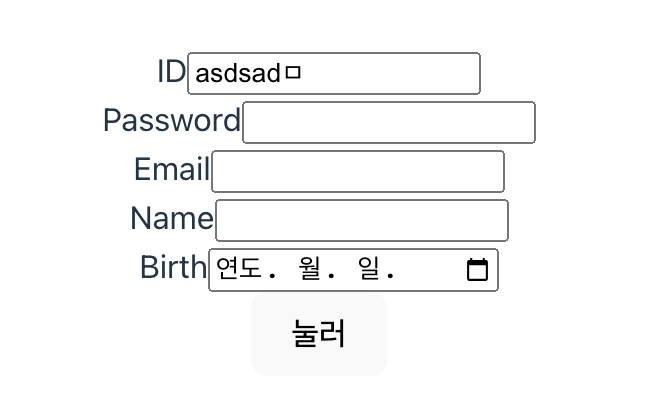
입력값 만들기
src/JoinUser.tsx
import { useRef } from "react";
import { JoinUserType, processJoinUser } from "../joinUserType";

const JoinUser = () => {
  const inputIdRef = useRef<HTMLInputElement>(null);
  const inputPasswordRef = useRef<HTMLInputElement>(null);
  const inputEmailRef = useRef<HTMLInputElement>(null);
  const inputNameRef = useRef<HTMLInputElement>(null);
  const inputBirthRef = useRef<HTMLInputElement>(null);

  return (
    <>
      <div>
        <label htmlFor='id'>ID</label>
        <input type='text' id='id' ref={inputIdRef} />
      </div>
      <div>
        <label htmlFor='password'>Password</label>
        <input
          type='password'
          id='password'
          ref={inputPasswordRef}
        />
      </div>
      <div>
        <label htmlFor='email'>Email</label>
        <input type='email' id='email' ref={inputEmailRef} />
      </div>
      <div>
        <label htmlFor='name'>Name</label>
        <input type='text' id='name' ref={inputNameRef} />
      </div>
      <div>
        <label htmlFor='birth'>Birth</label>
        <input type='date' id='birth' ref={inputBirthRef} />
      </div>
      <div>
        <input type='button' value='눌러' onClick={onClickHandler} />
      </div>
    </>
  );
};

export default JoinUser;
- Reducer보다 간편한 useRef로 연결해 input값을 추출했습니다.
전송버튼 누를 시 유효성 검사 실행
import { useRef } from "react";
import { JoinUserType, processJoinUser } from "../joinUserType";

const JoinUser = () => {
  const inputIdRef = useRef<HTMLInputElement>(null);
  ...

	function onClickHandler(event: React.MouseEvent) {
    event.preventDefault();
    const value: JoinUserType = {
      id: inputIdRef.current!.value,
      password: inputPasswordRef.current!.value,
      email: inputEmailRef.current!.value,
      name: inputNameRef.current!.value,
      birth: new Date(inputBirthRef.current!.value),
    };
			// 유효성 검사 실행
			const result = processJoinUser(value);
  }

  return (
    <>
      <div>
        <label htmlFor='id'>ID</label>
        <input type='text' id='id' ref={inputIdRef} defaultValue={""}/>
      </div>
      ...
			<div>
       <button type='button' onClick={onClickHandler}>
          눌러
       </button>
      </div>
    </>
  );
};

export default JoinUser;
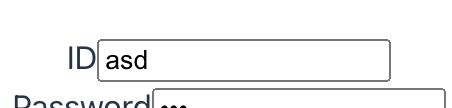
- ref의 current.value를 추출하였습니다. 그리고 null 타입은 JoinUserType에서 허용하지 않기 때문에 Definite Assignment Assertions기법을 이용해 ? 대신 !을 넣어주었습니다.
- 모든 input에서는 defaultValue 옵션값을 “”로 설정했습니다.
- 이런 입력값을 검사한다면 값이 이렇게 나옵니다.
예외처리
import { useRef } from "react";
import { JoinUserType, processJoinUser } from "../joinUserType";

const JoinUser = () => {
  const inputIdRef = useRef<HTMLInputElement>(null);
  ...

  function onClickHandler(event: React.MouseEvent) {
    ...
    const result = processJoinUser(value);
    console.log(result);
    if (!result.success) {
      // handle error then return
      console.log(result.error.errors)
    } else {
      console.log(result.data);
    }
  }

  return (
    <>
        ...
    </>
  );
};

export default JoinUser;
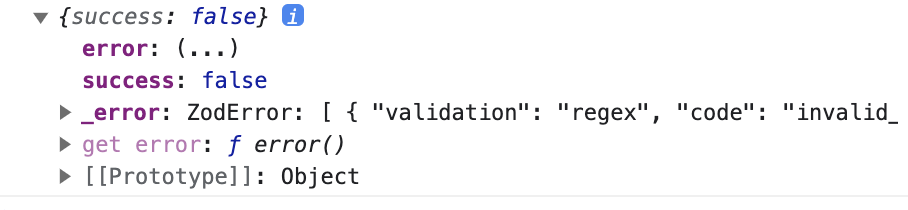
- result객체는 safeParse 메서드가 리턴한 값을 저장하고 있습니다.
- safeParse는 success 객체를 리턴하는데요. false시 error정보를 저장하고 있는 객체를 리턴합니다. true시는 성공한 객체를 리턴받습니다.
에러 시 메세지 추가하기
src/joinUserType.ts
// 입력값 유효성 처리
const JoinUser = z.object({
  id: z
    .string()
    .trim()
    .min(4, { message: "4글자 이상 적어주세요" })
    .max(20, { message: "20글자 이하로 적어주세요" })
    .regex(/^[a-z0-9_]+$/, {
      message: "알파벳 소문자, 숫자, 밑줄(**`_`**)만 사용할 수 있습니다.",
    }),
  password: z
    .string()
    .trim()
    .min(8)
    .regex(/^(?=.*[a-z])(?=.*[A-Z])(?=.*\d)(?=.*[@$!%*?&])[A-Za-z\d@$!%*?&]+$/),
  email: z.string().trim().email(),
  name: z
    .string()
    .trim()
    .min(2)
    .regex(/^[A-Za-z]+$/),
  birth: z.string().datetime(),
});
- 검사하는 메소드에 객체로 message 객체를 추가합니다.
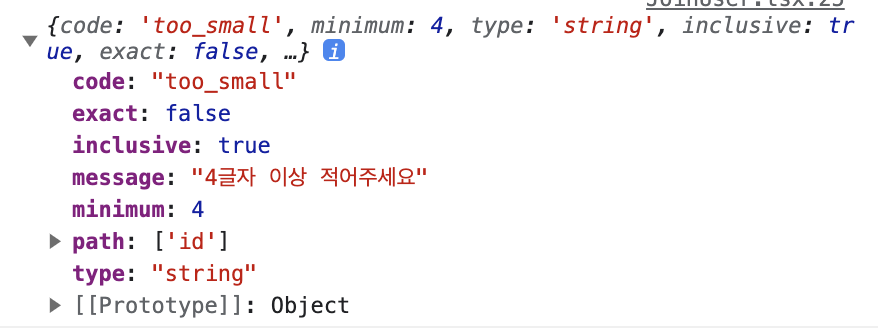
- 이런식으로 메세지 객체가 추가되어 리턴됩니다.
src/JoinUser.tsx
import { useRef } from "react";
import { JoinUserType, processJoinUser } from "../joinUserType";

const JoinUser = () => {
  const inputIdRef = useRef<HTMLInputElement>(null);
  ...

  function onClickHandler(event: React.MouseEvent) {
    ...
    const result = processJoinUser(value);
    console.log(result);
    if (!result.success) {
      // handle error then return
		console.log(result.error.errors[0].message);
    } else {
      console.log(result.data);
    }
  }

  return (
    <>
        ...
    </>
  );
};

export default JoinUser;
- message를 출력해봅시다. alert이나 modal로 사용자에게 표시할 수 있습니다.
자세한 코드는
https://github.com/gogleset/react_begin /React-Zod 디렉토리에 있습니다.
참고 글